![TW Blue Logo 230908a.png]](https://help.trakwell.ai/hs-fs/hubfs/TW%20Blue%20Logo%20230908a.png?width=126&height=17&name=TW%20Blue%20Logo%20230908a.png)
In this article
- Open a customer record
- Customer details
- Customer, History, and Notes tabs
- The gear menu
- Top bar actions
- The right panel
- Which note goes where
- Who can see what
Open a customer record
From Contact Manager, go to Contacts and click any customer in the list. Their record opens on the Customer tab.
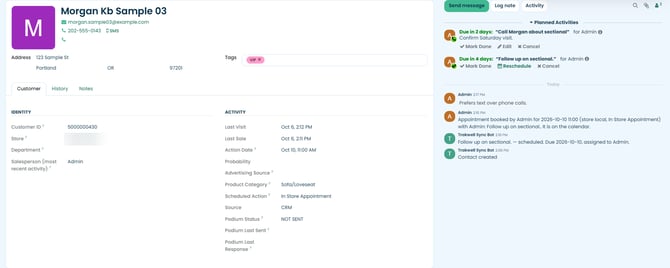
The record has three main areas:
- Customer details and tabs on the left
- Top bar actions across the top, like logging a sale or booking an appointment
- The right panel, where you send messages, log internal notes, and schedule follow-ups
Customer details
At the top of the record you'll see the customer's name, email, phone numbers, and address.
- Click the email to open a new message in your email app.
- Click SMS next to a phone number to text the customer.
Tags
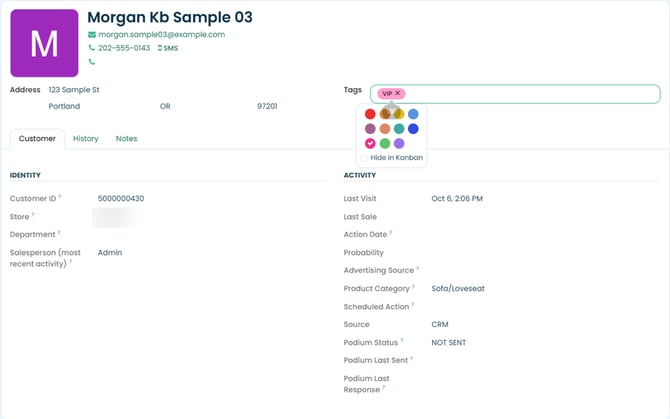
Use Tags to group customers, like "VIP" or "Grand Opening." Click the Tags field and pick one from the list. To make a new tag, click Search More, then New, and give it a name, category, and color.
Customer, History, and Notes tabs
Customer tab
This is where the record opens. It's split into two sections:
| Section | What's in it |
|---|---|
| Identity | Customer ID, Store, Department, Salesperson (most recent activity) |
| Activity | Last Visit, Last Sale, Action Date, Probability, Advertising Source, Product Category, Scheduled Action, Source, and Podium Status, Last Sent, and Last Response |
Hover over the ? next to a field to see what it means.
History tab
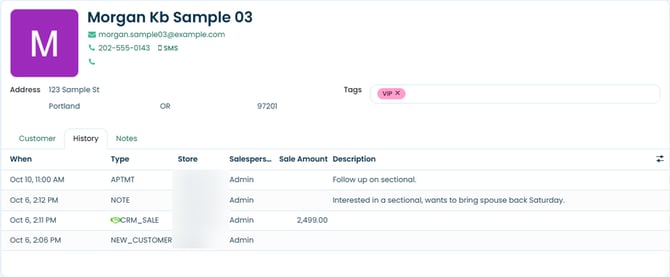
History is a running log of everything that's happened with this customer, like sales, lost sales, notes, and appointments. Each row shows when it happened, the type, the store, the salesperson, and details like the sale amount or description.
| Type | What it means |
|---|---|
| CRM_SALE | A sale was logged |
| LOST_SALE | A lost sale was logged |
| NOTE | A note was added with Add Note |
| APTMT | An appointment was booked |
| NEW_CUSTOMER | The customer was created |
Click the column icon at the far right of the header row to show or hide columns.
Notes tab
The Notes tab is a space for internal notes about the customer, like preferences or things to remember. These notes stay on this tab. They don't show in History or the right panel.
The gear menu
Click the gear icon next to the customer's name to open these options:
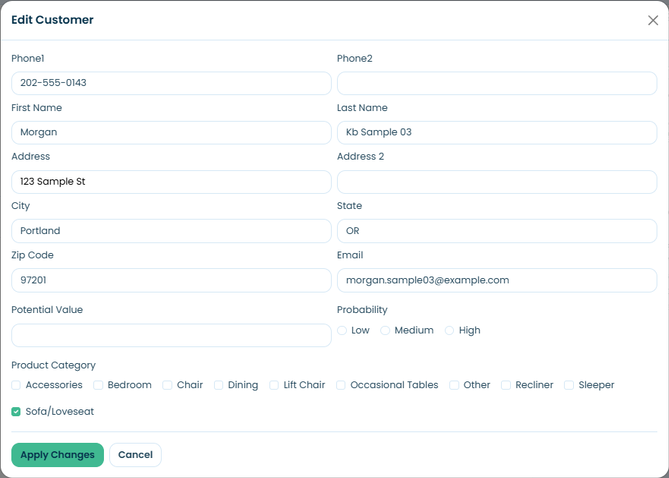
- Edit Customer: Update the customer's phones, name, address, email, potential value, probability (Low, Medium, or High), and product categories. Click Apply Changes to save.
- Archive: Archive a customer you no longer need.
- Download (vCard): Saves the customer as a contact card (.vcf file) you can add to your phone or email contacts.
Top bar actions
The buttons across the top let you take action on this customer. On smaller screens, some of them move under More.
Opportunities
See this customer's opportunities.
Meetings
Opens the calendar filtered to this customer's appointments. Click New to book an appointment with the customer already filled in. Use the icons in the top right to switch between calendar and list view.
The calendar only shows appointments for the people checked under Attendees on the right. If you don't see an appointment, click Add Attendees and add the salesperson, or switch to list view.
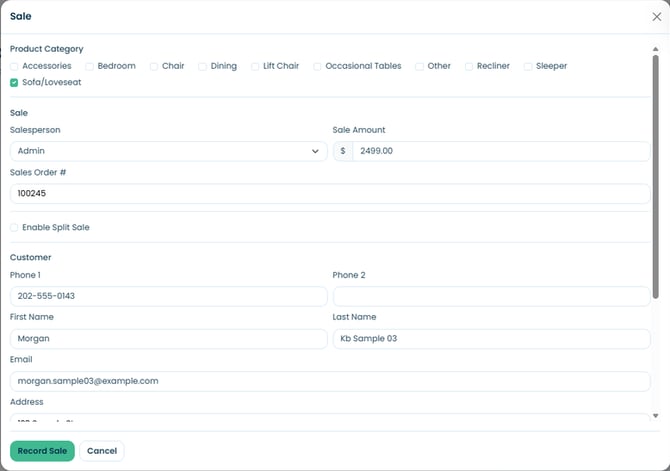
Sale
Logs a sale for this customer. The customer's info fills in automatically. Pick the Product Category and enter the Sale Amount and Sales Order #, then click Record Sale.
Two salespeople on one sale? Check Enable Split Sale and pick both. The credit is split evenly between them.
The sale shows in History as CRM_SALE.
Lost Sale
Use this when a customer walks without buying. Add a comment explaining why (this is required), then click Lost Sale. It shows in History as LOST_SALE.
Add Note
Adds a note of up to 600 characters, tied to a salesperson. It shows in History as NOTE.
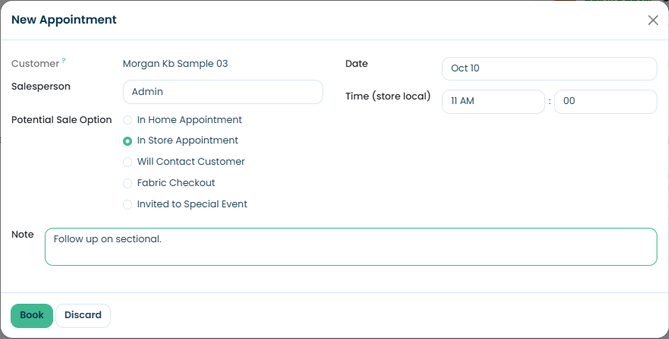
New Appointment
Books an appointment with this customer.
- Pick the Salesperson.
- Choose a Potential Sale Option: In Home Appointment, In Store Appointment, Will Contact Customer, Fabric Checkout, or Invited to Special Event.
- Pick the Date and Time. The time is in the store's local time.
- Add an optional Note. It becomes the appointment's note.
- Click Book.
The appointment shows in History as APTMT and on the calendar. It also appears in the right panel under Planned Activities as a to-do for the salesperson.
Send Email
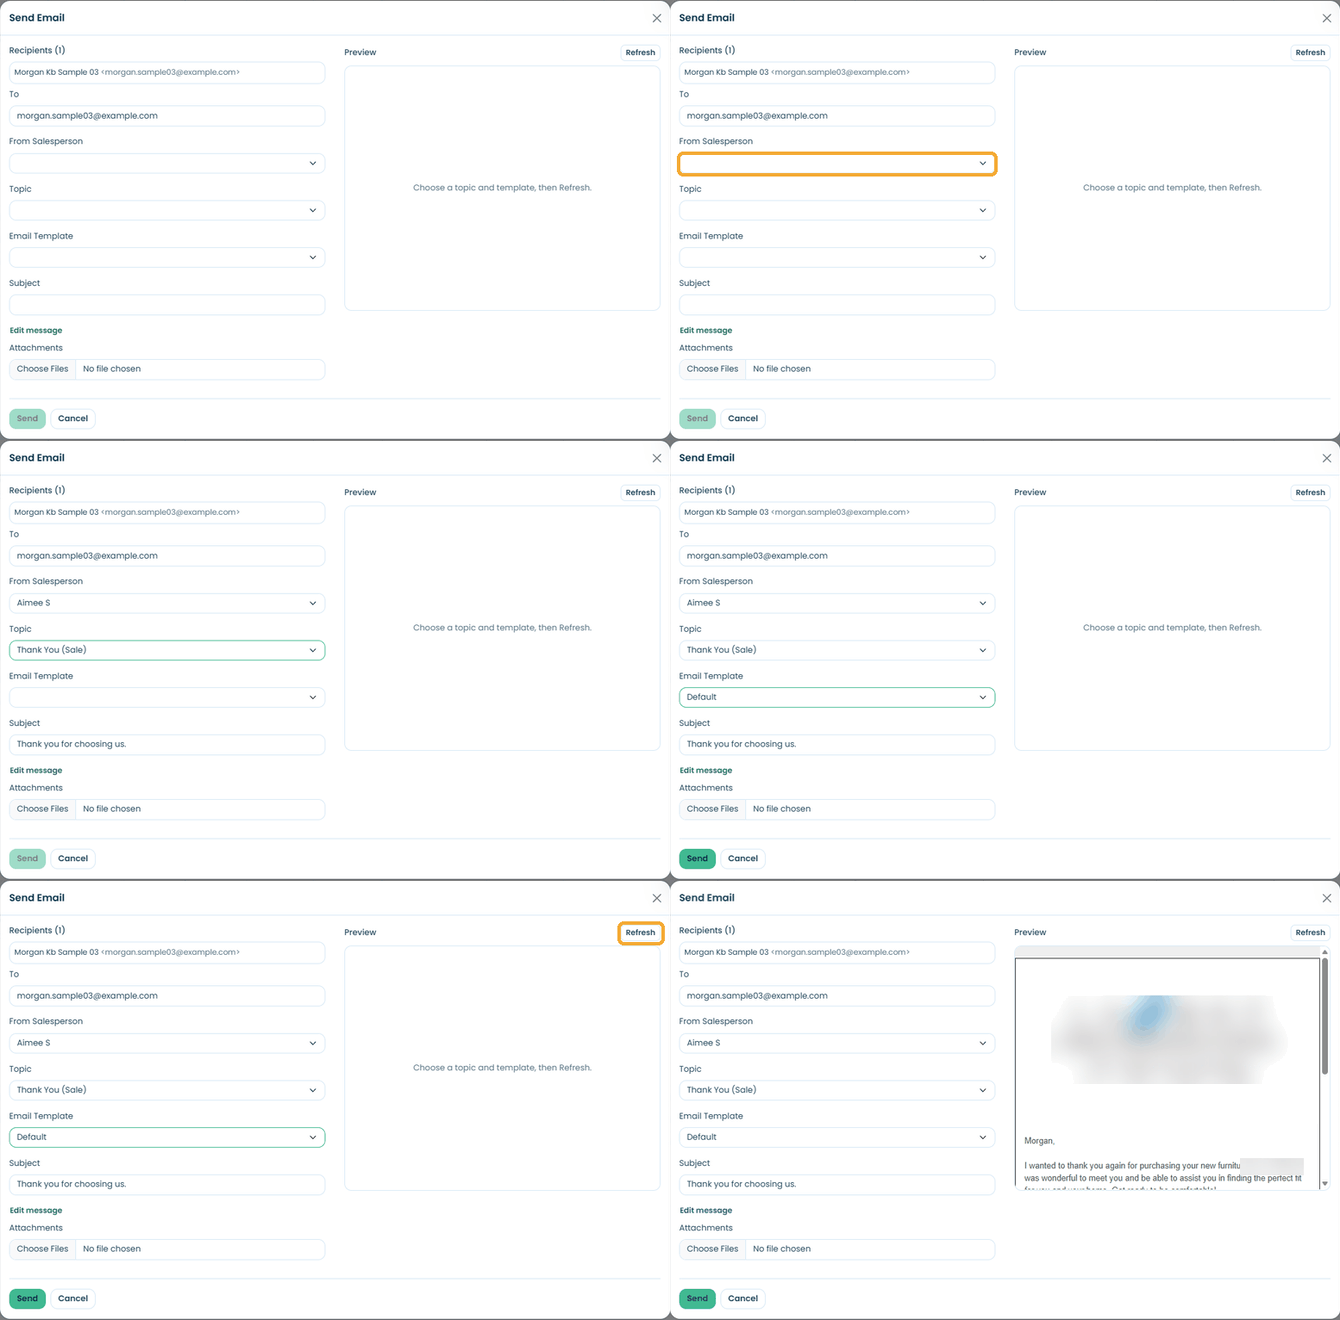
Sends the customer an email using a ready-made message.
- Pick the From Salesperson. Their name goes in the signature.
- Pick a Topic, like Thank You (Sale) or Schedule Delivery.
- Set Email Template to Default.
- Click Refresh to preview the email.
- Click Edit message if you want to change anything, add attachments, then click Send.
Topics are set up by your company admin under Admin > Templates Text.
Send Podium Review
Under More, this opens Send Podium Request to ask the customer for a review. The customer's info fills in automatically. Check the Store and Salesperson, pick a Template, and click Send.
Attachments
Under More, this lets you add files to the customer's record. Click File to upload. Allowed file types are csv, doc, docx, txt, xls, xlsx, jpg, jpeg, png, mp4, mov, mpg, pptx, and pdf.
The right panel
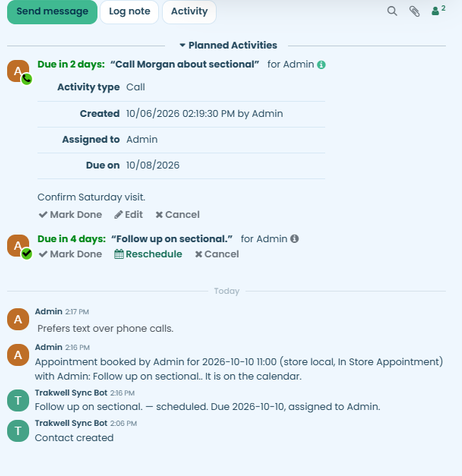
The right panel is where you message the customer, leave notes for your team, and keep track of follow-ups.
Send message
Emails the customer. Type your message and click Send.
Send message goes to the customer. For notes only your team should see, use Log note.
To get more room, click the expand arrow. The full composer lets you edit the subject, attach files, and schedule the email for later with the clock icon.
Email templates
In the full composer, click the three dots to:
- Select a Template you've saved before
- Save as Template to reuse the current message
- Manage Templates to see your templates and create new ones with New
Log note
Adds an internal note to the right panel. The customer never sees it.
Activity
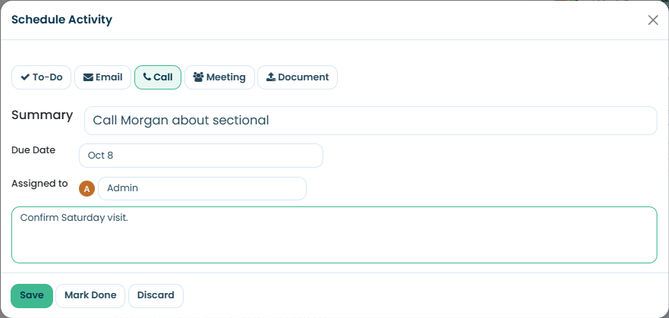
Schedules a follow-up task. Pick a type (To-Do, Email, Call, Meeting, or Document), add a summary, due date, and who it's assigned to, plus an optional note.
- Click Save to schedule it.
- Click Mark Done if you've already done it.
Planned Activities
Upcoming follow-ups show under Planned Activities, including appointments and Floorboard follow-ups. For each one you can:
- Click the info icon to see the activity type, who created it, who it's assigned to, and the due date.
- Click Mark Done, Reschedule or Edit, or Cancel.
Search, attachments, and followers
The icons at the top right of the panel let you search messages, see attachments, and manage followers. Click the person icon to follow or unfollow the customer, or Add Followers to bring in coworkers who should stay in the loop.
Which note goes where
There are a few ways to add a note. Here's where each one ends up:
| How you add it | Shows in History | Shows in right panel | Customer sees it |
|---|---|---|---|
| Add Note (top bar) | Yes | No | No |
| Log note (right panel) | No | Yes | No |
| Notes tab | No | No | No |
| New Appointment note | Yes | Yes | No |
| Send message (right panel) | No | Yes | Yes |
Who can see what
Which customers you can open depends on your role:
| Role | Customer records you can see |
|---|---|
| Salesperson | Your own customers |
| Store manager | Every customer in your store |
| Company manager | All stores on the account |
| Company admin | All stores on the account |
Still have questions? Reach out at support@trakwell.ai or call 833-503-9934.